31 Dec 2017
Shipping an Audio Pipeline
In 2017 I shipped a new audio rendering pipeline for the iOS version of
Google Play Music.
I use it to render a particular flavor of fragmented
MP4 that we use in the Google Play Music streaming music service. It was quite
a learning experience to write and ship real-time audio code on iOS.
If you are looking to write an audio pipeline for iOS, I highly recommend
basing it on The Amazing Audio Engine 2.
Core Audio is a powerful library with an peculiar API. TAAE2 provides a much nicer
API on top of Core Audio, without adding much overhead.
I had designed and implemented much of my new audio pipeline in 2016, but 2017
was the year that I deployed the pipeline to production.
I learned that shipping an audio rendering pipeline comes with a long tail of
bugs, most of which have the same symptom: “I was listening to a song when it
stopped”. I was able to find and fix most of my bugs by using a combination
of:
- Great base libraries. (TAAE2 and Core Audio)
- A clean, well-thought-out design.
- Unit tests.
- Assertions.
- Playback error logging that is aggregated on the server side.
- A/B testing. (Between different versions of my audio renderer code.)
- Excellent bug reports from alpha users.
- My boss and my boss’s boss’s boss were the two most prolific bug reporters.
- Several other alpha users went out of their way to help me diagnose bugs that affected them.
The error logging and A/B testing together gave me the confidence to roll out
the feature, by showing how well it performed compared to the previous
renderer stack.
Learning a new code base
In 2017 I joined the YouTube Music team to work on the iOS version of
YouTube Music,
which meant that I had to get up to speed on the
YouTube Music code base. It’s a large complicated app. I found it difficult to
get traction.
What finally worked for me was giving up my quest for general understanding. I
just rolled up my sleeves and got to work fixing small bugs and adding small
features. This allowed me to concentrate on small portions of the program at a
time, and also provided a welcome sense of progress. My understanding of the
overall architecture has grown over time.
Learning Swift and UIKit
In 2017 I audited both the iOS 10 and
iOS 11 versions of the Stanford iOS programming class. In past
years I’ve just watched the lectures. This year I actually did the programming
assignments. These classes gave me a thorough understanding of Swift and
UIKit. I felt they were well worth my time.
The reason I audited both the iOS 10 and iOS 11 versions of the course is that
changes to the Swift language meant that the final programming assignment of
the iOS 10 version of the class can’t be completed using Xcode 9. I was only
able to finish the first half of the iOS 10 version of the course. When the
iOS 11 version came out in December, I was able to resume my studies. I’ve
done the first 3 problem sets, and hope to complete more before the end of my
Christmas / New Years’ Day holiday.
Learning Machine Learning
I am fascinated by the recent advances in machine learning, especially the
DeepMind AlphaGo and Alpha Zero programs.
In 2016 I built a modest home PC capable of doing machine learning, but it sat
idle for most of 2017. I haven’t been able to do much with machine learning
other than read papers and run toy applications. I am contributing computer
cycles to the Leela Zero crowd-sourced Go
player inspired by AlphaGo.
As a long-time client-side developer, it’s frustrating that there’s no “UI” to
machine learning, and the feedback loop is so long. I’m used to waiting a few
minutes at most to see the results of a code change. With machine learning it
can take hours or days.
It is also frustrating that there are so many different toolkits and
approaches to machine learning. Even if I concentrate on libraries that are
built on top of Google’s TensorFlow toolkit, there are so many different APIs
and libraries to consider.
Learning to let go of personal computing
In 2017 I continued to adapt to the decline of the personal computer. I am
gradually retiring my local, personal computer based infrastructure, and
adopting a cloud-based mobile phone infrastructure.
I’m surprised how smoothly the transition has gone. I still have laptops and
PCs around my house, but the center-of-gravity for computer use in my family
is continuing to shift to phones.
I’m happy that I’m spending less time on computer maintenance.
Looking forward to 2018
My engineering learning goals for 2018 are:
- Finish the Stanford iOS 11 programming course.
- Write a small machine learning app.
- Help my kids improve their programming skills.
Hat tip to Patrick McKenzie for the
writing prompt.
03 Sep 2017
This summer I took my Seattle-based family of five for a three-week trip to
Europe. We had been promising the trip to our kids since they were little, and
this year we were finally able to go. We had a wonderful time!
Here are my tech-related traveling tips.
Disclaimer: I am not being paid to write this, and there are no affiliate
links. I’m writing this to help me remember my trip, and in the hope that it
will be helpful to other families (and maybe even couples and individuals)
planning similar trips.
Hardware Tips
Take your mobile phones
Take one modern mobile phone per person. Android, iPhone, either is fine, but
you’ll want something with a SIM slot and nice camera.
Leave your laptops at home
I didn’t take any laptops with me, and I was able to do everything I needed to
do using just my mobile phone. It was a relief to not have to lug around a
laptop.
A few times I had to request the desktop version of a web site, but for the
most part, the mobile phone worked fine for both apps and web browsing.
Obviously I didn’t do any long-form writing on my phone.
I suppose an iPad, Kindle, or Android tablet would be a possible alternative.
It might be a compromise between a phone and a laptop. I didn’t take any
tablets on my trip.
Leave your cameras at home
We didn’t take any non-phone cameras with us. Our phone cameras were good
enough for most pictures. (Note: if we were going on a wildlife safari to
Africa, we’d still take “real” cameras, so we could use telephoto lenses. But
for the kinds of pictures we wanted to take in Europe, phone-based cameras
worked fine.)
Tip: Most museums, and even most churches allowed people to use their
phones to take pictures of the art. This is a welcome change from the “No
cameras allowed” policy of the past.

International USB Chargers
Take international-style USB chargers, that have built-in adapters for foreign
wall power sockets. Look for chargers that have at least 2 USB ports, and ones
that are rated for 2.1 amps, because that sort of charger will charge your
phone faster than a lower-power charger. It’s also nice to get a “pass
through” charger, that lets you plug another electrical device into the
charger. This is handy for hotel rooms with no extra outlets.
I didn’t use this particular model of charger, but it’s the kind of charger I’m
talking about.
Tip: Many USB chargers have ludicrously bright power lights. Before you
leave home, cover the power lights with black electrical tape. Otherwise
they’ll keep you awake at night in the hotel room.
When traveling in the US I take a larger 6-port charger, so that I can charge
the whole family’s devices from one hotel power outlet. (And in my car I use a
4-port cigarette lighter charger.) But in Europe, because we were often on
trains with per-seat power outlets, it was more convenient to use multiple
2-port USB chargers.
Take extra chargers and USB cables and ear buds
Take extra USB chargers and charging cables and ear buds. They will get lost
and break. It’s convenient to have spares. Don’t bring a too many, though. If
you run out, USB chargers and cables and ear buds are available for low cost
in vending machines and stores across Europe.
Take battery packs
Take a cheap USB Battery Pack with you. This will ensure you always have at least one
working phone, no matter how long you stay out, or how much you use maps / web
/ photos. In fact, consider taking one pack for every two family members.
Phone cases
Put inexpensive rugged phone cases on your phones, to reduce damage from
accidental drops. My family is partial to Otterbox and Incipio cases, but shop
around to find something you like.
Selfie sticks
You should swallow your pride and take a selfie stick. It makes it so much
easier to take good group photos. Be aware of your surroundings, and don’t
annoy your fellow tourists.
I confess that I was too proud to take a selfie stick, and as a result I have
very few photos that include everyone in my family. I regret that!
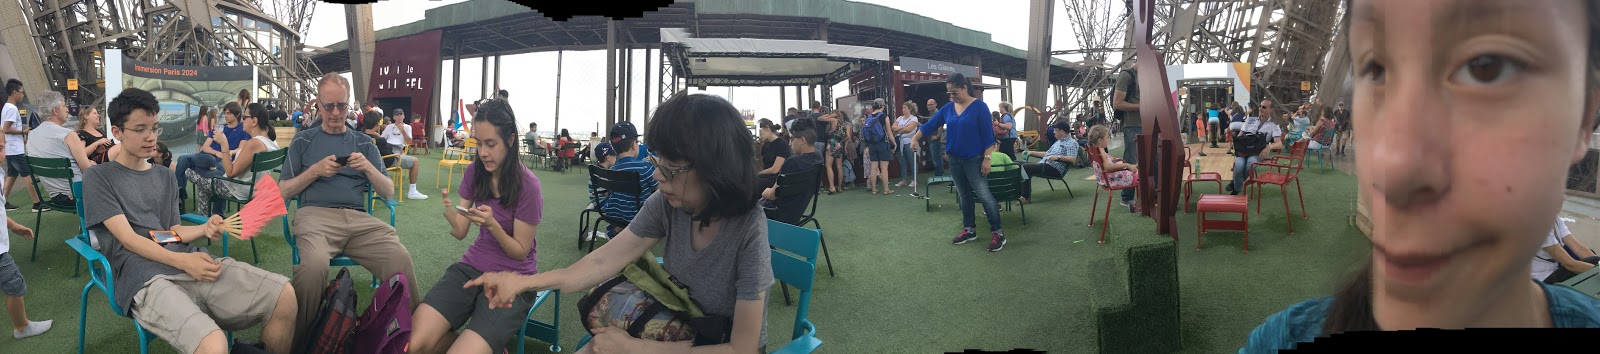
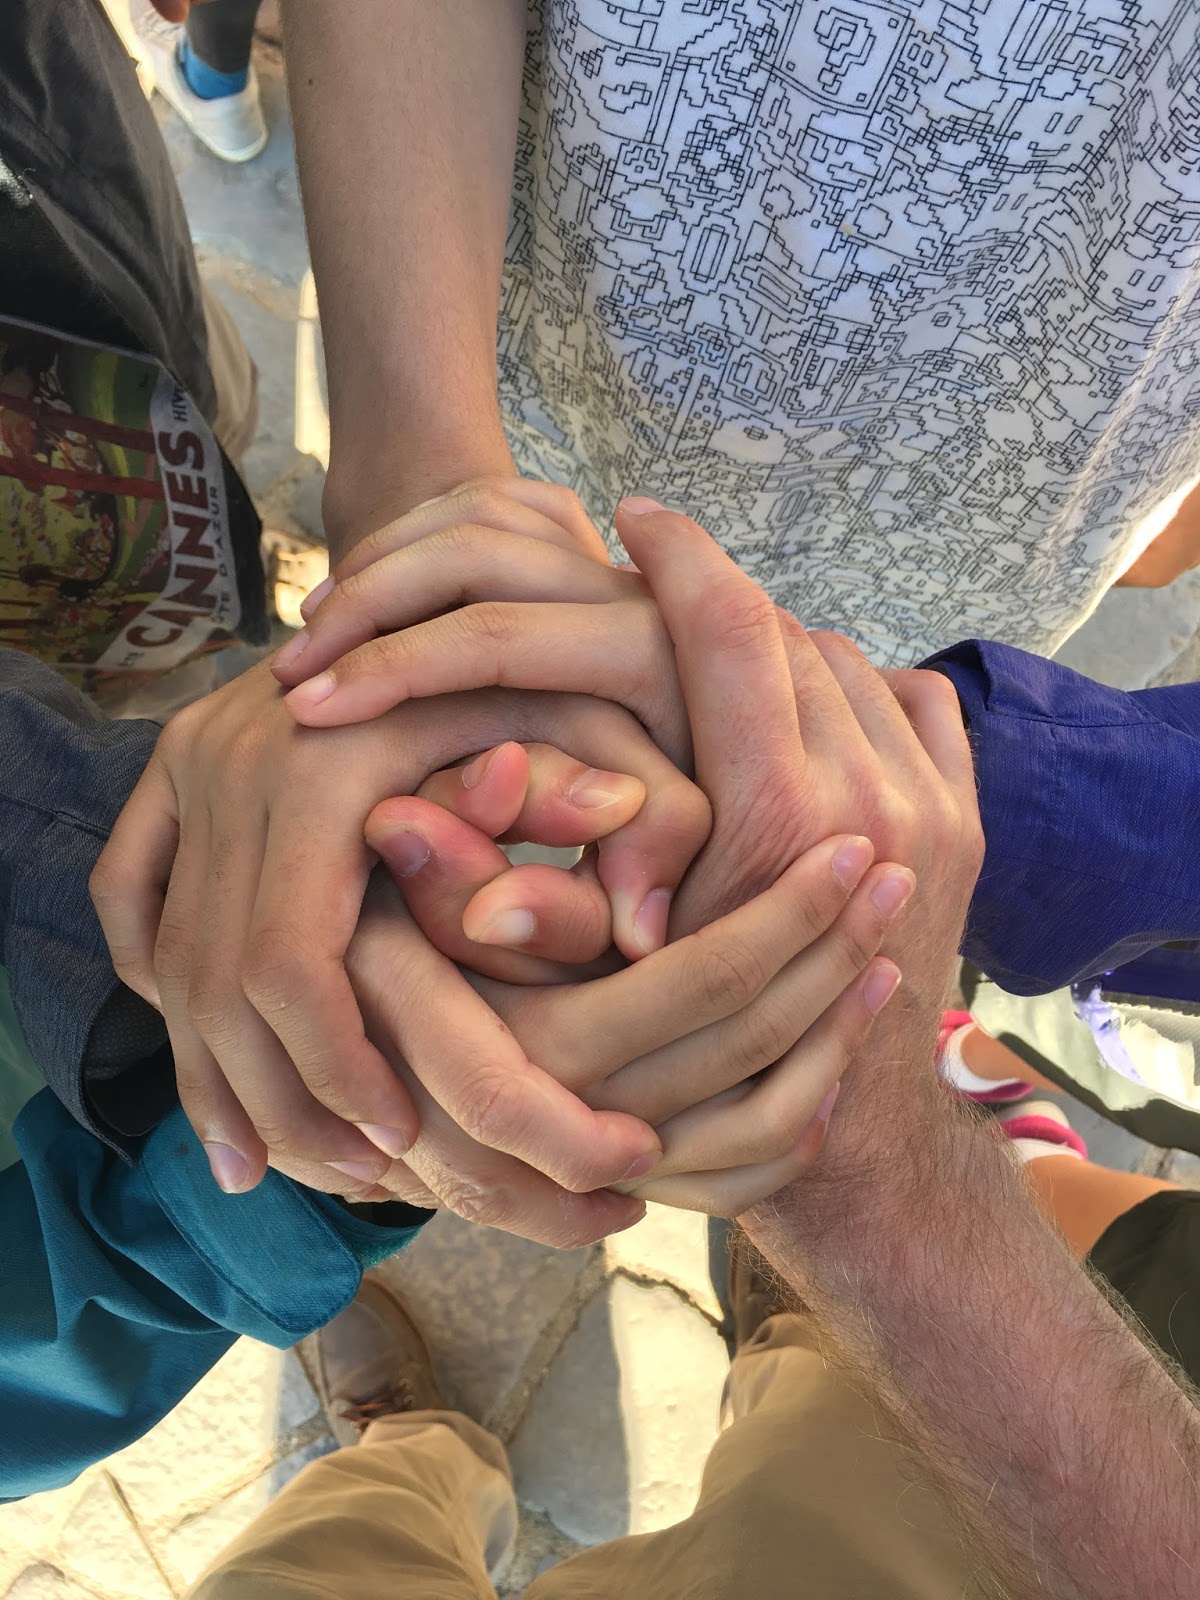
Proof you can take a photo of your whole family without using a selfie stick.
But posing options are limited:
Use a mesh bag to organize your electronics
As any backpacker knows, small mesh bags are invaluable for keeping track of
small items. Buy a mesh bag from a camping store (or a laundry store) and use
it to store all your chargers and cables. For my family, something that worked
well was for me to carry the whole family’s chargers and cables. I’d hand them
out at the beginning of a train or plane trip, and collect them at the end of
the trip.
Phone service
You don’t have to have phone service for your trip. You can get pretty far
just using WiFi.
However, if possible, I recommend that you get mobile phone service for at
least one of your family’s phones. It is tremendously useful and convenient to
have for maps, search, and translation.
Free International Roaming
If you have T-Mobile, get their
international roaming
plan added
to your account before you go. It gives unlimited data and texts in many
countries. Bonus: The plan only promises 2G speeds, but we found in several
places we were getting much higher speeds. My guess is that some countries
have turned off 2G network access, and in those countries you’re getting the
higher 3G or 4G speed for free. Presumably this extra speed won’t last
forever, but it’s a nice benefit for now.
Expensive International Roaming
My impression is that other US carriers have fairly expensive international
roaming plans. But since I’m not a customer, I don’t know the details. Check
with your carrier – maybe they have a plan that fits your needs and budget.
Buying a local SIM while in Europe
If you don’t have T-Mobile, most European countries have relatively
inexpensive short-term SIMs available for purchase at kiosks in airports.
You’ll need to have an unlocked phones to do this.
Potential problems with older Verizon and Sprint phones
If you have an old, pre-4G, Verizon or Sprint phone, that doesn’t have a SIM
slot, you will have trouble using European phone networks.
Make sure your phone is carrier unlocked
If you bought your phone from a mobile carrier, it’s probably locked to their
network. That makes it difficult to use with another network’s SIMs. Before
your trip, contact your carrier and ask them to unlock your phone. They will
usually be willing to unlock your phone, but it depends upon the carrier and
the terms of your contract. You may have to pay an unlocking fee.
If all else fails, consider buying a travel phone
If you can’t unlock your phone, or if your phone doesn’t have a SIM slot,
consider buying a phone just for the trip. As of the fall of 2017 you could
get a used unlocked iPhone 5s 16GB for $125. That model phone would make a
good travel phone. There are similar deals available on older high-end Android
phones.
Receiving text messages while on vacation
If you are using a country-specific SIM while you’re traveling, you may run
into a problem. Any text message sent to your normal phone number won’t get to
your phone while you are using a different SIM in the phone. This could be a
problem for you, because many online services want to send you a text message
to verify your identity. You won’t receive the text message while you’re using
a different SIM.
The simplest way to deal with this problem is to cross your fingers, and hope
that you don’t need to receive texts while you’re on vacation.
The second-simplest way is to sign up for T-Mobile international roaming, at
least if you’re already a T-Mobile customer.
If you’re a customer of another phone company, you might consider signing up
one of your phones for an international roaming plan, that lets you receive
and send texts to/from your US phone number while traveling. Even if it’s
expensive, it may save you a lot of trouble if you need to receive a text
message while you’re on vacation.
If you’re an advanced techie, you could consider signing up for a VoIP service
(like Google Voice), which allows you to send and
receive text messages over the web. It can also be set up to forward your
voice calls from your main number to your travel SIM number. But using a VoIP
service is complicated. It’s probably more trouble than it is worth for most
people.
WiFi, power, and mobile phone coverage
Here’s what I found in my trip, which covered Spain, Paris, and Frankfurt.
WiFi
Most tourist hotels and apartments have some form of WiFi. Usually it’s free
with your room, although some high-end or business oriented hotels will charge
you. Hotel WiFi can be slow and flakey.
Many tourist restaurants have free WiFi. Ask your server for the password.
Many museums have free WiFi. A few museums have QR codes on exhibits that you
can scan to learn more about the exhibit item.
Some towns have some form of public WiFi, but I was never able to get it to
work.
Most airports have free WiFi.
Some high-speed trains have WiFi, either free or paid.
Unfortunately there is currently no transatlantic plane flight WiFi service. I
think it’s a technology limitation.
USB / wall power
USB and wall power plugs are available at each seat on most planes and high-
speed trains. The wall power plugs are European-standard plugs and voltage.
Just as in the US, many airports have at least a few USB ports and electrical
outlets scattered around the waiting area.
In Madrid I even found USB charge ports installed on one of of the transit
buses!
Mobile phone coverage
Mobile phone service is very good in major cities. Mobile phone service can be
spotty in the countryside.
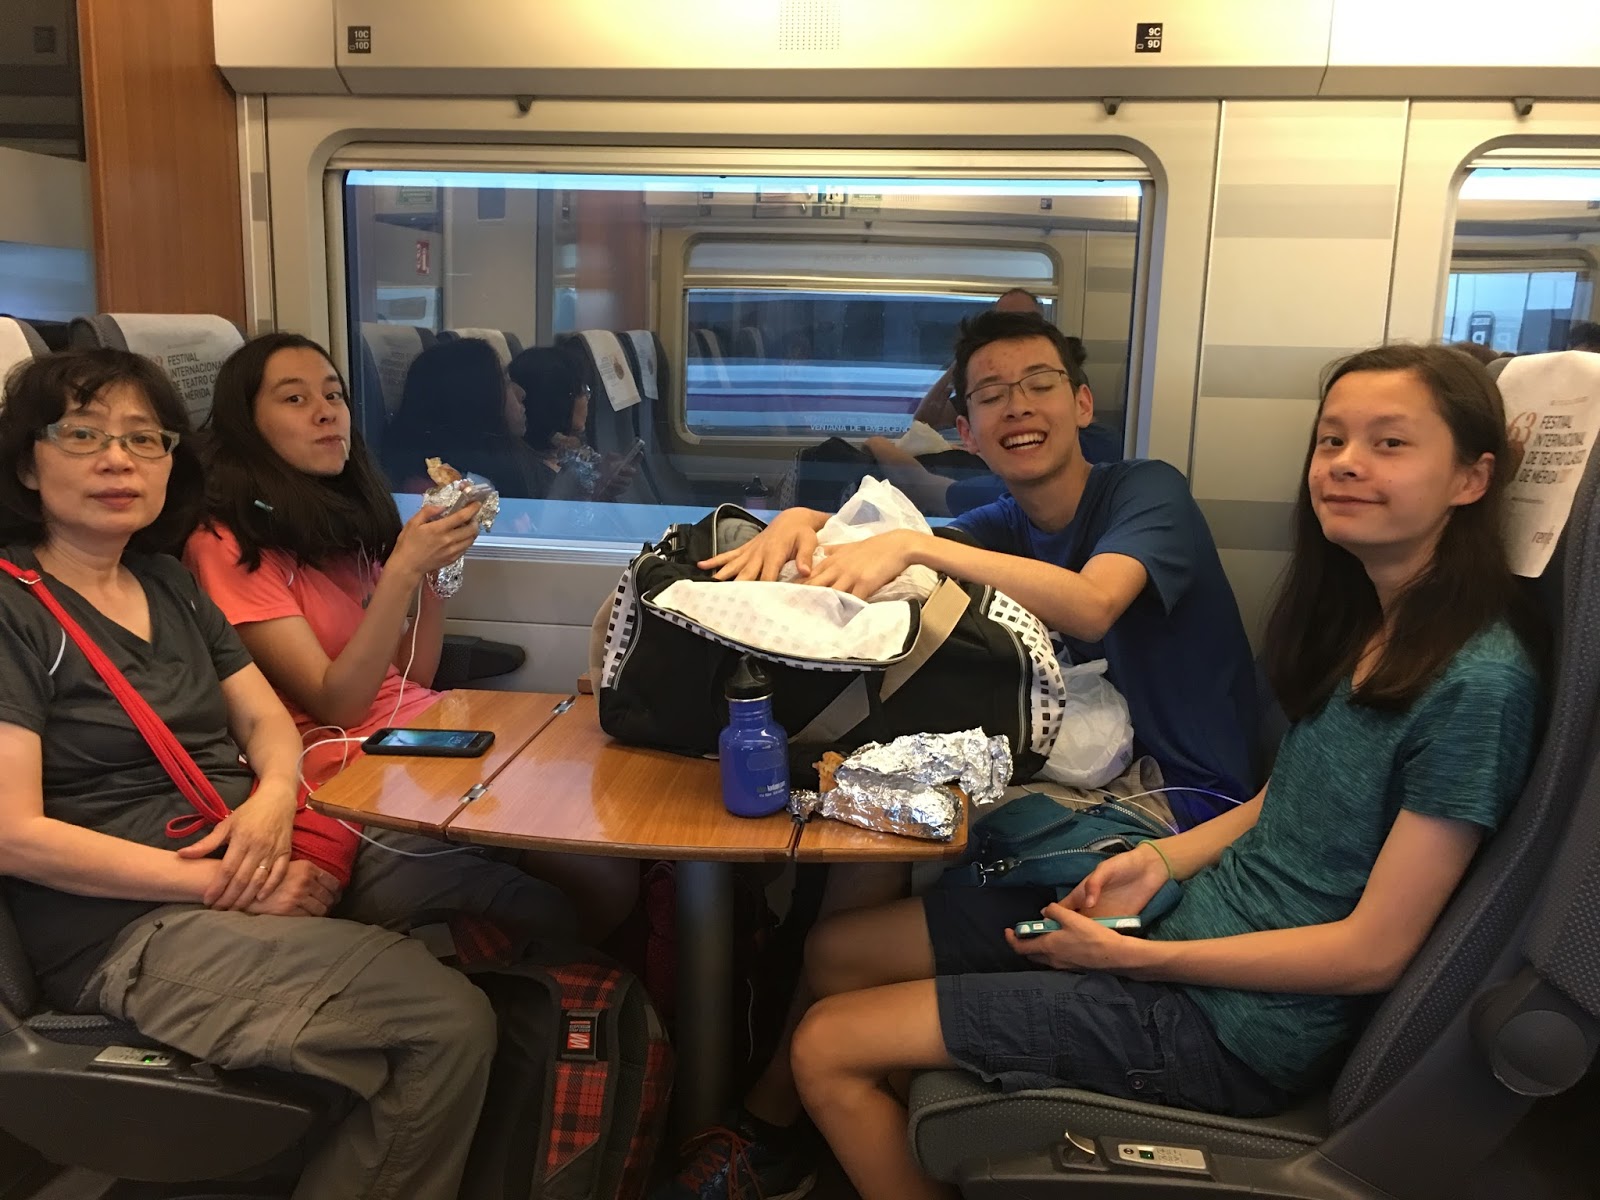
Lunch with phones on a Spanish high speed train:
Keeping your phones from being stolen
Unfortunately, pickpockets and thieves are common in tourist areas of major
European cities. Your phone is an easy target. Thieves like to steal phones
because:
- They’re easy to steal.
- They’re valuable.
- Older phones can usually be unlocked, erased and sold.
- Newer phones, that can’t be unlocked, can still be stripped for parts (battery and screen) that can be sold.
- SIMs can be taken out of both old and new phones
- An unlocked SIM can be used to charge money to your phone bill.
- An unlocked SIM can be used to receive texts sent to the SIM’s phone number, useful for identity theft.
You can take some steps to minimize the potential problems of theft:
Take your older phones
If your family has several generations of phones laying around, consider
taking the older phones. That way you won’t feel as bad if they’re broken,
lost, or stolen. Of course you have to balance this against the benefits of
taking your newest phones, which will have the best cameras.
Wear anti-theft clothing
Consider buying some pickpocket-proof pants.
If you cary a purse or small bag, store your phone in a hard-to-get-into
zippered internal pocket. Figure out a way of carrying your phone so that it’s
in front of you, where you can keep an eye on it. Some backpacks have phone
pockets on the shoulder straps.
Don’t ever leave your phone on a table in a public place.
Turn on “Find my Phone”
Both Android and iPhone have an optional feature you can turn on to make it
easier to find a lost phone. It’s called Find my Device
on Android, and Find my iPhone on iOS.
Tip: Thieves know to power off stolen phones to prevent them from being
tracked. But the feature is still handy for finding phones that are lost or
misplaced rather than actually stolen.
Put a passcode on your phone lock screen
You should have at least a 4 digit passcode on your phone lock screen. In
addition to keeping thieves from being able to erase your phone in order to
resell it, this will make it harder for thieves to break into your phone to
steal your identity.
SIM Lock your phone SIM
Add a PIN to your SIM card. Having a PIN on your SIM is annoying, because
you’ll have to type the PIN to unlock your SIM every time you reboot your
phone. But having a SIM lock can save you a lot of trouble and money if
thieves steal your phone. Without a SIM lock, the thief can take the SIM card
out of your phone, put it into another phone, and then charge hundreds of
dollars to your phone account by calling for-pay telephone numbers.
Without a SIM lock, thieves can also put your phone’s SIM into another phone
to receive texts sent to your phone number. An ambitious thief could use your
phone’s SIM to hijack your online accounts.
Know how to report a lost/stolen SIM to your phone carrier
If your phone is lost or stolen, you should report it to your phone carrier
right away. If you’ve put a lock screen passcode on your phone and added a SIM
lock, you probably will be OK. But there is always a chance that the thief
has figured out a way to bypass those lock codes.
Tip: Print out your phone account information (carrier customer service
number, account number, your phone number, and the SIM serial number) and
carry it with you on your trip. Keep that paper separate from your phone. (Do
the same for your passports!)
Keeping your accounts from being stolen
Be careful when you use public WiFi. Just as in the US, using public WiFi in
Europe means it’s possible for bad guys to listen in on the data being sent
and received by your phone. Bad guys can even set up fake servers, that
pretend to be Facebook, or Gmail, or your bank, and try to trick you into
revealing your login name and password.
Just like in the US, there are things you can do to make it less dangerous to
use public WiFi in Europe:
- Avoid using “high value” web sites, like your bank, from public WiFi.
- Avoid visiting “http” web sites from public WiFi. “https” web sites are more secure.
- Use an up-to-date version of your phone’s operating system.
- Use up-to-date versions of your apps.
Tip: Before you leave the US, consider turning on “two factor
authentication” for important accounts. Two Factor Authentication will make
it harder for identity thieves to impersonate you. However, there is a
tradeoff. Most “two factor authentication” systems use text messages. This
means you’ll have to be able to receive the text messages while you’re
traveling, which means you’ll have to set up international roaming for at
least one of your phones.
Essential apps
Tip: I work for Google in my day job, so the following list is a little
Google-centric. 😇
Google Docs
Use Google Docs App Store
Play Store
to share a trip itinerary with your family. (You can also share an edited
version with parents and neighbors.) An itinerary is a day-by-day list of what
you are doing. Put in dates, cities, flight and train times, hotel contact
info, and “must see/do” lists. Using a shared document makes it easier to keep
the information up to date.
Tip: Turn on “offline mode”, which stores a copy of your documents locally
on the phone, so that you can read and edit them even when you don’t have
internet access.
Google Maps
Google Maps App Store
Play Store
is hugely useful when traveling in Europe, not just for maps and navigation
and transit directions, but also for local restaurant and attraction reviews.
I felt like a local being able to read the auto-translated reviews of all the
bakeries and grocery stores near my hotel.
Tip: Download the area you’re planning on visiting as an offline map.
That way you can get around even if you don’t have WiFi or phone service.
Tip: Double-check opening hours, since Google Maps doesn’t always list
the correct opening hours, or account for local holidays, or restaurants being
closed due to the owner’s vacations.
Tip: Google Maps lets you mark map locations using various icons. For
example I found it helpful to mark my hotel on the map, as well as any sites I
was interested in seeing in that city. That made it easier to plan my day, and
to plan what to do next. I could quickly look at the map and see if there was
anything within walking distance.
Vietnamese food was a welcome treat. Tastes just like back home! Restaurant
found with Google Maps.

Google Photos
Google Photos
App Store
Play Store
provides free unlimited photo and video storage. It also provides an excellent
photo search feature.
The way my family used Google Photos during our trip was that we would take
pictures and videos during the day. Then, each evening, when we returned to
our hotel, we would bring the Google Photos app to the foreground, and keep it
there while it uploaded the day’s pictures and videos.
Some hotels had very slow WiFi, so sometimes we had to wait until we got to a
better hotel to do this.
Once the upload had finished, we used the “Free up space” menu item to delete
all the locally stored photos, which freed up phone storage for the next day’s
photos and videos.
Tip: Whenever you pass a restaurant or store or attraction you’re
interested in visiting, take a picture of it. That can be helpful when you’re
trying to remember the name of the restaurant the next day.
Google Translate
Google Translate App Store
Play Store
is able to translate many signs and menus. And while many people in Europe
speak English, it is sometimes useful to be able to translate an English
phrase into the local language.
Tip: Use Google Translate to translate text on menus and sign. Tap on the
camera icon in the app.
Tip: Download a language pack for each country your visit. This enables
Google Translate to work even when you don’t have WiFi or phone service.
Google Hangouts
Google Hangouts
App Store
Play Storeis
a free group messaging app.
My family used Google Hangouts group messaging to stay in touch, not only with
each other, but also with grandparents back home. We got into the habit of
sending a few highlight pictures and a short description of our day’s events
to the grandparents each day. It was easy to do, and afterwards we saved the
conversation as a nice record of our trip.
Tip: There are many other group messaging apps, use whatever one your
family is comfortable with.
Tip: Include grandparents in the group chat, it makes it more fun to have
an audience to share your stories with.
Tip: If you’re staying at apartments rather than hotels, you may need to
download a country-specific chat application to stay in touch with the
apartment landlord. For example, WhatsApp is popular in some European
countries.
We watched the Bastille Day fireworks on cable TV in our rental apartment in
Paris, while in a group Hangout chat with my mom back in America, (She was
watching on a live-stream.) 
Google Keep
Google Keep
App Store
Play Store
is a handy To Do list app. I used it to keep track of snippets of information
about places I wanted to visit, as well as tasks to do when returning to the
US.
Google Trusted Contacts
App Store
[PlayStore]
is a cross-platform app that lets you see where your family’s phones are in
real time. Handy for meeting up in a large museum, at least as long as GPS
reception is good.
Tip: If your family is 100% iPhone, Apple has a similar, iPhone-only
“Find my friends” app.
TripIt
I had a TripIt Pro account through my workplace.
It was helpful because it kept me up-to-date on the status of my airplane
trips. Things like telling me when the plane had arrived, which gate it was
at, and when the flight was delayed.
TripAdvisor
TripAdvisor is a good source of information on
attractions and restaurants. Its UI is a little slow, and it tries hard to up-
sell travel packages. But if you can get past all the advertising, it’s a good
resource for finding out what to see and do in a new city.
Inessential, but fun, apps
Consider using a diary app to keep track of you trip.
The text adventure game 80 Days
App Store
Play Store
is fun to play while traveling.
Similarly, Old Man’s Journey
App Store
Play Store
and Burly Men at Sea
App Store
Play Store
are fun quick travel-themed adventure games.
You can use your standard social and media apps while traveling. Instagram,
YouTube, Google Books, Google Play Music, and so on. For media apps be sure to
download media ahead of time, to be able to use the app while you don’t have
network connectivity.
Buying attraction tickets online
Most of the large museums and attractions in Europe have online ticket sales.
The museum web site usually has an English-language page. You pay by credit
card, and you receive the ticket as an email containing a PDF file. You are
instructed to print out the PDF and bring it with you to the museum.
You don’t need to print out the ticket, though. It is also possible to show
the PDF on your phone screen. The ticket PDF usually has a bar code (or QR
code), and the ticket-taker’s bar code scanner will usually work with the
phone screen just as well as on paper.
Tip: Be sure to zoom in far enough that the individual stripes of the bar
code are visible.
Tip: Sometimes it’s helpful to use your phone’s web browser’s “Request
Desktop Site” mode, to request the desktop version of the web site. Sometimes
the desktop web site has more information and/or features than the mobile
version.
Tip: Take cropped screen shots of your family’s tickets’ QR codes, and
arrange them all together in your phone’s photo gallery. This makes it easier
at the ticket gate, since you can quickly swipe from ticket to ticket, to
quickly present all your family’s tickets to the ticket taker.
If you don’t know how to take a screen shot on your phone, ask your kids. 😁
Tip: Contact your credit card company before you travel, and let them know
that you will be traveling to Europe. Doing this can help you avoid having
your credit card declined due to unusual account activity.
Conclusion
Mobile phones are essential for modern traveling. The last time I went to
Europe, over 20 years ago, I had to use paper guide books and pay phones and
post cards and a film camera. Revisiting Europe today, with mobile phones, it
was so much easier to get around, and I think I saw more things. I certainly
took more pictures!
If you read this far, I assume you’re planning your own trip to Europe. I hope
that this article gave you some good information to help you have a good trip.
I hope you and your traveling companions have a great time!
A family we met in Madrid:

06 Aug 2017
My son and I competed as team “Blue Iris” in the ICFP 2017 programming contest.
The ICFP programming contest is an annual
3-day programming contest sponsored by the International Conference on Functional Programming.
Functional programming is an
approach to writing programs that stresses writing as much of the program as
possible in terms of functions. That’s as opposed to the more commonly used
imperative programming.
In the contest, people form teams to compete for three days to solve a
problem, using any combination of programming languages. People compete for
the joy of problem solving in the language of their choice. It’s common for
people to use outlandish or obscure programming languages. It’s sort of like
the Wacky Races of programming
contests.
[
I’ve competed in this contest about six times over the past 10 years. This
year was the first year my son joined me. My son’s got about a year’s worth of
programming experience, mostly in Java. He was eager to compete in the contest
with me this year.
This year we happened to be on vacation in Taiwan during the contest. It’s hot
and humid in Taiwan, but the internet infrastructure is great, so we expected
to not have any problem competing.
The contest started at 8pm Friday night Taiwan time. I prepared by buying a 2
liter bottle of Coke Zero at the local Wellcome market, and we eagerly waited
for the contest to begin.
Each year the problem to be solved is revealed as the contest begins. The type
of problem varies by year. This year’s problem was to write a program that
claimed edges on a graph. The goal was to construct a path from a “mine” node
to a set of “customer” nodes. Scoring was based on the number of customers
served.
After reading the problem description, we had to decide what programming
language to use. We were originally considering Python. But because the
problem had strict execution time limits, we decided that it would be better
to use a faster running language.
I decided to go with Go, for the following reasons:
- I knew Go and its libraries well.
- Go runs well both on MacOS (where we were programming) and on Linux (where the contest organizers would be judging the program.)
- Go has easy-to-use networking libraries.
- Go has easy-to-use type-safe JSON marshalling and unmarshalling code.
- There was the potential to use Go’s goroutines for extra performance.
We got to work, reading the problem specification and starting to write the
basic program.
I had hoped to do pair programming, but that didn’t work out. The time scale
wasn’t right. I’d say “OK, now I’m going to write the structs we’re going to
use to read in the JSON”, and then I wouldn’t say anything else for an hour,
while I was doing that. Imagine how boring that was for my son!
I also regret that the time pressure meant that I couldn’t answer my son’s
tangential questions – “What’s a graph?”, “What’s functional programming?”,
“What’s JSON stand for?”. I should probably have given up on trying to
compete, and instead used the time to educate my son. D’Oh!
Friday night we got as far as communicating with the contest’s servers and
reading in the problem’s JSON configuration file. My son was helpful in
monitoring the contest web site and twitter for announcements. He also helped
read the spec and serve as a foil for debugging.
Saturday morning we got up early, had a quick breakfast, and got to work. We
made steady progress, although as is typical we lost a few hours to dumb
mistakes. The worst one was a stray printf that broke the offline mode of the
app.
My son installed an IRC client (his first time using IRC) and he enjoyed
monitoring the contest IRC channel. He helped other contestants overcome
issues that we had already encountered.
By lunchtime we had our first working program, that simply picked the first
unclaimed edge on the map. It did surprisingly well against some opponents on
some maps.

We ate delicious pizzas from the local Maryjane Pizza restaurant, and then went back to work.
By 6 PM we had our final lightning round, which tried to create paths from
mines to consumers. It worked, but not very well. Still, good enough for the
lightning round.
We spent a few hours decompressing and researching graph algorithms to use in
the main contest, and then went to bed.
On Sunday morning (day 2 of the contest) we decided not to continue with the
main contest. Our reason for quitting was a combination of burnout and
disinterest, combined with the sense that some teams were doing much better at
solving the problem.
What went right
- We blocked off a whole weekend to compete in the contest.
- We had the contest VM installed and running before the contest began.
- The Go programming language worked well.
- The JSON, networking, and IO libraries were great.
- Very few platform-specific issues between MacOS and Linux
- Go made it easy to call an OS API on Linux to fix the lamduct EAGAIN issue that caused much heartburn to teams using languages like Java.
- Super fast compile time.
- Makefile-less build. The entire build script was: go build
- My son was an eager, supportive teammate.
- Our Internet and computer hardware worked flawlessly.
What went wrong
- Go is not quite the right language for graph traversal contests.
- Too difficult to develop abstractions for graphs.
- Temptation to use slices and maps for everything, which works, and is fast, but is too low level. Going up a level of abstraction introduces a lot of boilerplate.
- Go’s manual error checking adds a lot of overhead to writing code on “contest time”.
- The Sublime Go IDE experience has regressed since I’ve used Go seriously. The GoSublime plugin seems to have rotted away in the past few years.
- Using Go disenfranchised my son, who currently only knows Python and Java.
- Our small team couldn’t afford to invest time in writing tools (visualizers and contest servers) that would have helped us.
- My wife, who is a puzzle solving expert, was away during the contest. I’m sure she would have been a huge help in algorithm development.
Also, as my son diplomatically put it, “the problem was not the most
interesting”. I think we would have had more fun with a more competitive or
physics oriented problem. To be fair, this year’s problem as roughly in the
middle of all the problems that have been presented. It’s certainly more
interesting than 2010’s or 2013’s abstract math problems.
Conclusion
Despite giving up on the main contest, we had fun during the lightning
contest. We look forward to reading the results of the competition and reading
the other teams’ postmortems. And we look forward to competing again in 2018!
07 Aug 2016
As the summer of 2016 draws to an end, it’s time to plan my family’s IT setup
for the 2016-2017 school year.
My current setup
Phones for kids
The big change this year was that my youngest kids got their own phones. The
process went well. I’m glad I spent the extra money to buy refurbished iPhone
5s’s instead of cheaper phones. The iPhone 5s’s have been reliable and easy to
administer. The 16 GB of storage has occasionally been a problem.
I restrict my youngest kids’ phones so that they can’t install apps. It’s
tedious to have to unlock and then relock the phones to install apps for them,
but I like being able to have a say on which apps they have on their phones.
I bought Otterbox cases, which worked well at protecting the phones. So far
all the phones have survived. One phone did get dropped in the water briefly,
but it worked OK after it dried out.
The T-Mobile Simple Choice plan has worked well for us. It has a 1 GB/month
data cap per line. When you exceed the cap you still get data, but at a low
speed.
A nice bonus: T-Mobile gave everyone unlimited high-speed data for 3 months
last year. I believe the kids used an average of 2.4 GB per month while that
was available. But they seem mostly happy with the 1GB / month limit.
Laptops work great
The Macbooks have been great. They’re used for web access and light content
creation.
Declining desktop usage
Our computer usage has shifted to laptops. Our desktop Mac mini computer goes
weeks between uses, and I notice that I seem to be the only one logging into
it these days.
Modest tablet usage
Our two tablets get relatively little usage. The mini is used for puzzle
games, the Pro is used for comic book reading, video watching, and
drawing/animation programs.
This is partially a “personal vs. shared” issue. People prefer their personal
phone and/or laptop to shared tablet.
It’s also a “tool at hand” issue. I find myself using a laptop or phone rather
than a tablet just because the laptop or phone is always closer to hand.
Minimal Apple TV usage
Our Apple TV gets almost no usage. Its controller sucks for games, and family
members prefer to watch video on their personal laptop or phone.
Our family TV is used mostly by my wife who still likes watching broadcast TV
in the evenings.
What didn’t go according to plan
Apple’s hardware releases modified last year’s plan:
- I dropped the Android TV in favor of the latest Apple TV. The Apple TV works great, but it turns out that we don’t use it much.
- I exchanged my iPad Air 2 for an iPad Pro. Love the keyboard and stylus.
Beats headphones are low quality
I spent a lot of time this year dealing with broken headphones. My daughter’s
Beats wired headphones failed twice while under warranty. Apple was nice
enough to replace them (with refurbished headphones) each time, but it
required two trips to the Apple Store for each incident.
Getting rid of old electronics
For what it’s worth, Amazon has a good trade-in service that buys old
electronics for a fair price. Not as good a price as you’d get on Swappa or
craigslist, but zero hassle. I used it to get rid of a bunch of old consumer
electronics gear that I’d accumulated over the years.
Best hardware purchases
- Phone holders for the cars.
- Multi-port USB chargers for car.
- Multi-port USB chargers for bedside.
- Short (4 inch) USB cables for bedside charging.
- Long (10 foot) USB cables for car and couch.
- External battery packs for recharging phones.
Plans for 2016-2017
- Keep current phones & laptops.
- I will upgrade to the latest iPhone just because I need it for my work.
- A Sony Playstation 4 NEO.
- My son is desperate to play the latest video games.
- Support school-issued Windows laptops.
Keeping current hardware
I’m happy with my current hardware. The equipment is reliable and easy to
administer. There doesn’t seem to be anything significantly better on the
market or on the horizon.
My kids report that the iPhone 5s is the current “standard” phone model among
their classmates. (6th grade and 8th grade). So at the moment there isn’t any
social pressure to upgrade. My son would like a larger screen and a bigger
battery. I got him an external battery pack, we’ll see if that helps.
Apple is rumored to be introducing new Mac hardware this year, but based on
rumors it doesn’t seem to be significantly better for our budget and use cases
than our current hardware.
Consoles vs PC gaming
My son’s grown out of Minecraft, and now wants to play teen games.
In the past few years Macs have stopped being able to run modern games. mostly
due to Apple not supporting recent 3D graphics APIs.
High-end gaming PCs work well for games, but they’re expensive to buy and
maintain.
A console seems like the best choice for us. Based on performance and
exclusives I’m leaning towards the Sony Playstation 4. A new version of the
PS4 is rumored to be coming out in October. I’ll probably get that.
Return of Windows devices
The big change to my home network this year will be dealing with school-issued
Windows laptops. I want to keep the Windows devices off my home network, but I
also want to give them access to the Internet and to a local printer. I think
the simplest way to do this is to buy a new Wi-Fi printer, and put the laptops
and printer on a guest network.
I could get a fancy router and set up multiple virtual networks, but buying a
second printer seems simpler. Perhaps if the second printer supports cloud
printing I can use it from all my devices, and then retire my current printer.
I think the whole idea of a local network is becoming obsolete. In many cases
it’s simpler to assume that every device is always on the public internet, and
just configure the device to survive in that environment. The only devices in
my house that really need to be behind a firewall are the printer and the NAS.
Slimming down
If anything, I might simplify my home network by retiring the desktop computer
and the NAS.
In the past I used the NAS for storing backups and downloaded videos. But
these days I use cloud services for both backups and videos. I rarely use the
NAS.
I rarely use my scooter computer. It was educational to set it up, but I don’t
really use it.